How to Choose and Use a 3D Layered Christmas Tree SVG Without Wasting Time or Money
A 3D layered Christmas tree SVG offers a beautiful way to create dimensional papercraft decor that stands out from flat, printed holiday designs. The concept is straightforward: multiple cut layers are stacked using foam adhesive to create depth, resulting in a sculpted tree that seems to glow when placed inside a shadow box. However, the path from downloading a file to displaying a finished piece is full of small but costly mistakes. Whether you are a hobbyist making gifts or a small business owner building an Etsy shop, understanding these pitfalls will save you materials, time, and a great deal of frustration.
What Exactly Is a 3D Layered Christmas Tree SVG?
A 3D layered SVG file contains individual vector layers designed to be cut from paper or cardstock, stacked consecutively, and often displayed in a frame or shadow box. Unlike a flat SVG image, these files are engineered to produce physical depth. Each layer typically represents a different plane of the tree, ranging from the backmost silhouette to the frontmost star or trunk. The appeal lies in the visual depth and texture, which standard flat cuts simply cannot mimic. If you use a cutting machine like a Cricut or Silhouette, these files are straightforward to load and cut, but success depends on factors beyond the machine itself.
Mistake #1: Ignoring Layer Count and Depth Design
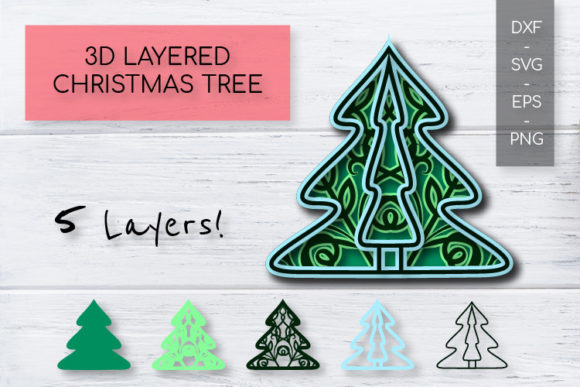
The most common error is assuming every file labeled "3D layered" delivers true dimensional depth. Many designs include only two or three layers, which results in a stack that looks flat even after assembly. A two-layer tree does not create a sculpted appearance. It simply looks like two pieces of paper glued together. This mistake significantly impacts your final presentation. If you are selling finished decor, customers expect a substantial, layered look. Anything less feels cheap.
You should look for designs with five or more layers for a noticeable sculpted effect. Some premium SVGs include seven to ten layers, which produce smooth transitions from dark to light green and create deep shadows between the branches. Examine the product photos carefully. A good designer will show the stack from an angle so you can see the depth. If all the images are straight-on or heavily filtered, request side-angle photos from the seller before purchasing. The number of layers directly correlates with the quality of the 3D effect.
Mistake #2: Overlooking SVG File Structure and Quality
Not all SVG files are created equal. Many poorly designed SVGs contain messy paths, duplicate lines, or layers that are not properly separated. When you upload a low-quality SVG to your cutting machine software, you may encounter unexpected problems. The machine might cut random internal pieces, skip intricate sections, or refuse to recognize the layers altogether. This leads to wasted cardstock and a deeply frustrating crafting session.
You can avoid this by buying from established designers who label their layers clearly. A well-structured SVG will show layers named sequentially, such as "Layer_1_Back," "Layer_2_Middle," and so on. Check reviews specifically for comments about file quality in cutting machines. A good rule of thumb is to perform a test cut on inexpensive cardstock before using your premium materials. This step takes ten minutes but can save you from ruining expensive holographic or metallic paper. A properly built vector file should scale cleanly without losing detail and should not require you to manually reorganize the entire design.
Mistake #3: Scaling Without a Plan
Scaling an SVG up or down sounds simple, but 3D layered designs have structural limitations. If you take a design intended for a five-by-seven-inch frame and scale it to twelve inches, the delicate tree branches become too wide and heavy for the paper to support. Conversely, shrinking a large design too much makes the tiny cut lines impossible to weed or assemble without tearing.
The impact of this mistake is structural failure. Your tree may sag, break, or simply look disproportionate inside its frame. Before you resize anything, check the designer's recommended size range. Most layered SVGs are optimized for a specific size, often around eight by ten inches. If you want a larger display, look for a file specifically designed for larger dimensions. Alternatively, use thicker cardstock, such as 110lb or chipboard, when scaling up to ensure the branches remain rigid. Always preview the cut lines in your software to see if any parts become too thin or too thick after scaling.
Mistake #4: Skimping on Materials and Assembly Tools
Using the wrong materials is a guaranteed way to undermine a beautiful SVG design. Regular copy paper is not suitable for 3D layered papercraft. It lacks the stiffness needed to stand upright and will curl or tear during assembly. Similarly, using cheap foam tape that is too thin defeats the purpose of a layered design. If the foam tape is only one millimeter thick, the layers will sit too close together, and the depth you paid for will be invisible.
You should match the material weight to the design's intricacy. For most standard SVGs, 65lb cardstock works well for the main layers, with 110lb cardstock recommended for the base. Use foam tape in varying thicknesses: one millimeter for subtle details, two or three millimeters for the main layers to create noticeable gaps. Some crafters also use chipboard or heavy cardboard for the back layer to provide a rigid foundation. Investing in quality foam adhesive and sturdy cardstock directly improves the final appearance and longevity of your piece. Cheap materials make even the best SVG look mediocre.
Mistake #5: Forgetting the Foundation (Base and Background)
Many beginners focus entirely on the tree layers and ignore the base layer and background. A 3D layered tree needs a solid, stable foundation. Without a sturdy backboard, the layers have nothing to attach to, and the entire piece becomes fragile and difficult to display. Additionally, the background color you choose dramatically affects how the tree looks. A dark green tree against a dark blue background will disappear. White layers on a white background offer no contrast.
The correction is straightforward. Always include a thick base layer in your project. Many quality SVG files already include a back plate designed to fit standard shadow boxes. If your file does not, create a simple rectangle cut from heavy chipboard to serve as the anchor. Choose a background color that contrasts with your tree. Soft cream, warm white, or dark red backgrounds make the green layers pop. Gold or silver backgrounds add a festive, premium feel. Test a small mockup on your computer screen before committing to the final cut.
Mistake #6: Designing in a Vacuum (Ignoring the Display Environment)
A 3D layered Christmas tree SVG looks completely different depending on how and where it is displayed. A tree sitting on a tabletop gets light from above, which casts shadows downward. A tree inside a shadow box with front-facing lighting looks flat. The beautiful depth you worked so hard to create can disappear if the lighting is wrong.
One of the best adjustments you can make is to add backlighting. Placing a small LED strip or a battery-operated light pad behind the layers inside a shadow box transforms the piece. The light catches the edges of each paper layer, amplifying the shadows and making the 3D effect highly visible. If you prefer a tabletop display, place the tree on a small stand or easel at eye level so the layers are visible from the side. Consider the viewing angle when assembling your layers. If the tree will be viewed from slightly above, ensure the top layers do not completely obscure the lower ones. A well-designed file accounts for this, but you should still check your specific composition.
Mistake #7: Overlooking the Fine Print (Licensing)
If you plan to sell finished items made from a Christmas tree SVG, you must check the license agreement. Many sellers assume that purchasing a digital file grants them full commercial rights. This is often not the case. Some licenses allow personal use only. Others restrict you to selling a limited number of physical items. Using a file improperly can lead to your Etsy shop being suspended or receiving a cease-and-desist letter from the designer.
You can avoid this by reading the commercial use terms before hitting the buy button. Look for clear statements regarding:
- Personal vs. commercial use: Is selling allowed at all?
- Sales volume limits: Is there a cap on the number of items you can sell?
- Credit requirements: Must you attribute the designer in your listings?
- Extended licenses: Is one required for mass production or large-scale sales?
If the terms are unclear, message the seller directly before purchasing. A legitimate designer will have a clear, accessible licensing policy. Paying a small amount for an extended license is far cheaper than dealing with a legal issue or losing your sales platform. Respecting licensing also supports the designers who create the high-quality files you rely on.
Bringing It All Together: Better Choices Lead to Better Results
The difference between a professional-looking 3D layered Christmas tree and a disappointing one often comes down to preparation. Choosing an SVG with genuine depth, verifying its file structure, scaling it appropriately, using the right materials, and understanding your display environment all contribute to a successful project. Licensing is an equally important step that protects your business and respects the creator. Each of these factors is within your control. By adjusting your approach and checking these details before you cut, you will produce decor that looks dimensional, holds up over time, and truly captures the holiday spirit. Take the extra few minutes to evaluate your SVG and materials carefully. The result will be a finished piece that looks as good as the inspiration photos you admired.