Mastering the Seasonal Workflow with a Multi Layer 3D Christmas Design SVG File
The pressure of the holiday season often forces creators and small business owners into a reactive mode, scrambling to produce decorations, gifts, and marketing materials under tight deadlines. Moving from a reactive to a proactive workflow requires treating digital assets not as one-off graphics, but as reproducible production blueprints. A Multi Layer 3D Christmas Design SVG File is precisely this kind of asset. It is a structured data set that dictates material lists, machine settings, assembly sequences, and final output dimensions. This article examines how to integrate this file type into a complete, scalable process—from initial planning and material procurement to batch production and long-term asset management.
Understanding the Asset as a Process Component
Before loading any material into a cutting machine, it helps to view a layered SVG file as the central node in a production system. Unlike a simple single-layer image, a multi-layer 3D design contains explicit instructions for depth, shadow, and structural alignment. This transforms the design phase from what should I make? into how do I efficiently produce this?
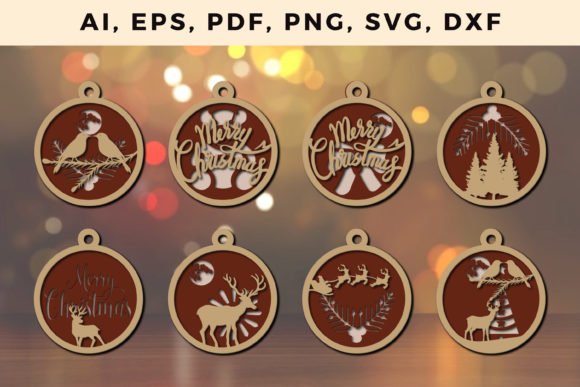
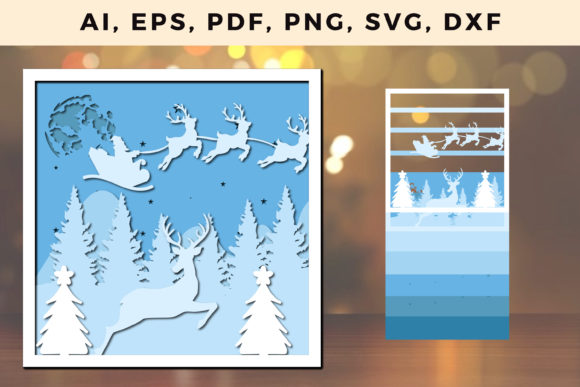
When you download a Multi Layer 3D Christmas Design SVG File, you are acquiring a sequence of interlocking parts. Each layer has a specific function: a backing base, mid-level shadow details, and a top decorative surface. Recognizing this structure allows you to plan resources before cutting begins. You can map each layer to a specific material and color, estimate total production time, and determine the exact quantity of foam adhesive or chipboard needed to achieve the dimensional effect. The file becomes the bridge between a creative concept and a physical, repeatable product.
Pre-Production: File Audit and Material Mapping
The single most effective way to avoid mid-project frustration is conducting a thorough pre-production audit. Opening a new design file and immediately hitting "cut" often leads to wasted material and misaligned layers. Instead, follow a structured preparation sequence.
Software Compatibility and Layer Inspection
Begin by importing the file into your design platform—whether that is Cricut Design Space, Silhouette Studio, LightBurn, or Adobe Illustrator. Immediately inspect the layer panel. Look for locked groups, excessively complex node paths, or embedded raster images masquerading as vectors. A well-constructed file will have clean, logically named layers. If the layers are labeled generically, take two minutes to rename them (e.g., "Base_Kraft", "Layer2_Red_Foam", "Top_Glitter_Green"). This simple act of organization pays dividends when you are working under time pressure.
Scaling and Material Constraints
Multi-layer 3D designs rely on precise alignment. Scaling the file up or down affects the thickness of material needed for the 3D effect. A design intended for a 12x12 inch cardstock base will have different tolerance requirements than one scaled down to fit a 4x4 inch gift tag.
- Thin materials (cardstock, paper): Scaling down can make intricate cut pieces fragile. Increase the size slightly or use a heavier paper weight.
- Thick materials (chipboard, basswood, acrylic): Ensure the SVG's slot-and-tab mechanisms or glue tabs are appropriately sized for the material thickness. A 3mm slot will not fit a 5mm piece of wood.
- Material mapping: Assign specific materials to specific layers in your software. Group identical materials together to minimize blade or tool changes during the cutting process.
The Execution Phase: Cutting, Layering, and Assembly
With the file prepared and materials selected, the execution phase focuses on maintaining consistency and speed without sacrificing quality. The Multi Layer 3D Christmas Design SVG File acts as your assembly manual, but your physical workflow determines the final result.
Batch Processing for Efficiency
If you are producing multiple units, avoid cutting one complete design at a time. Instead, use the layer structure to batch process. Cut all of Layer 1 for ten ornaments, then all of Layer 2, and so on. This reduces blade changes and allows you to monitor material usage more accurately. Lay out the cut pieces on a dedicated assembly station with labeled sections corresponding to each layer number. This transforms an individual craft project into a reproducible manufacturing line.
Adhesion and Dimensional Consistency
The "3D" effect in these designs is achieved through spacing between layers. The SVG file typically indicates where foam squares or chipboard spacers are required. Standardize the thickness of your adhesive. Using a mix of 1mm and 2mm foam tape across different units will produce inconsistent results. Decide on a single spacer height—usually 2mm to 3mm for cardstock—and apply it consistently. A jig or simple template can speed up the placement of adhesive pads on complex designs.
Assembly Sequence
Work from the bottom up. Attach the base layer to the first spacer layer, then align the next decorative layer on top. Many multi-layer SVGs include registration marks or corner guides printed directly into the file. Use these as physical alignment tools. If registration marks are not present, consider creating a simple acetate template with alignment holes that matches the base layer.
Post-Production: Archiving, Scaling, and Quality Control
Once a project is completed, the natural instinct is to move on to the next task. However, the post-production phase is where long-term efficiency is built. The value of a Multi Layer 3D Christmas Design SVG File extends far beyond a single use case if you manage it correctly.
Digital Asset Management
Store the file in a logically organized folder structure. Use a naming convention that includes the year, theme, material type, and version.
- Example: 2024_Christmas_3D_Tree_Cardstock_V2.svg
- Example: 2024_XMAS_WindowDisplay_Laser_Basswood_V1.svg
Include a companion text file or PDF that documents the exact materials used, the machine settings (pressure, speed, multi-cut settings), and the adhesive specifications. This documentation is invaluable when you need to reproduce the item a year later or hand off the production to a team member.
Color Palettes and Thematic Reuse
The structural design of a multi-layer SVG is color agnostic. A sophisticated Christmas tree design can be cut in traditional green and red, or in monochromatic white and silver for a modern winter wedding. By changing the material assigned to each layer, you effectively create a new product without editing the vector file itself. This is a core efficiency strategy: one structural file, multiple output variations. Track which colorways sell best or receive the most positive feedback to inform future material purchasing decisions.
Integrating the Multi Layer SVG Across Different Use Cases
Different audiences will interact with this file type in distinct ways, but the underlying integration principles remain consistent.
For Small Business Owners and Entrepreneurs
Your focus is on minimizing variable costs and maximizing repeatable output. Use the file to create a consistent product line. For example, a single Multi Layer 3D Christmas Design SVG File of a snowflake can be sized to produce earrings, ornament toppers, and large wall decor. The production process is identical across all sizes, only the material gauge and machine settings change. This creates a cohesive brand aesthetic across your entire holiday inventory.
For Educators and Workshop Leaders
The multi-layer structure provides a tangible lesson in digital design, spatial reasoning, and manufacturing sequence. Have students inspect the SVG layers before cutting. Ask them to predict which layer is the base and which is the top, and explain why certain shapes are scored versus cut. This transforms the file from a craft activity into a STEM learning tool. The ability to scale the project to fit available materials also teaches adaptability.
For Marketers and Creatives
Consider the file for dimensional mailers or point-of-sale displays. A well-designed 3D SVG can be cut from lightweight corrugated plastic or heavy cardstock and assembled by hand. This creates a high-impact, tactile marketing piece that stands out from standard flat mailers. The planning process involves coordinating the SVG production with printing and fulfillment timelines, making the file an integrated part of a larger campaign schedule.
Key Observations for Long-Term Efficiency
Working with multi-layer SVG files over multiple seasons reveals a few practical realities. First, always prototype in cheap materials. A test cut in plain cardstock reveals alignment issues, scaling problems, and assembly bottlenecks before you commit to premium glitter cardstock or expensive wood veneer. Second, the complexity of the file should match your production volume. Intricate layers with tiny tabs create beautiful results but increase assembly time and the risk of tearing during weeding. For high-volume production, simplify the file or reinforce critical connection points.
Finally, treat the SVG file as a living document. If you discover that a specific layer always aligns slightly off, modify the file. Add a small registration tab or increase the slot tolerance. The ability to edit and refine the digital asset based on physical production feedback is the hallmark of a mature workflow. The Multi Layer 3D Christmas Design SVG File becomes not just a design, but an optimized production tool that improves with each use.
By integrating this file type into a structured process—preparation, execution, and archiving—you move from seasonal scrambling to consistent, high-quality output. The result is more time to focus on creativity, customer engagement, or simply enjoying the holiday season without the shadow of inefficient production hanging overhead.