Unwrap the Magic: Mastering Skinny Tumbler Sublimation for a 3D Christmas
When the holiday season arrives, we look for ways to make our celebrations feel extra special. From twinkling lights on the tree to personalized gifts that show we care, every detail matters. Enter the world of skinny tumbler sublimation Christmas 3D — a crafting technique that has taken the DIY and small-business community by storm. Whether you're a seasoned crafter or someone who just discovered the joy of sublimation, this article will walk you through everything you need to know about creating stunning, dimensional Christmas tumblers that practically glow with festive cheer.
By the end, you'll understand what makes these tumblers unique, how the 3D effect works, and why they've become such a beloved part of modern holiday gifting and home decor. Let's unwrap this topic together.
What Is Skinny Tumbler Sublimation?
Let's start with the basics. A skinny tumbler is a tall, narrow drinking cup — usually made of stainless steel or coated with a special polyester layer — that holds around 20 to 24 ounces. Unlike standard tumblers, the "skinny" design fits most car cup holders, making it highly practical for everyday use.
Sublimation, on the other hand, is a printing process where heat and pressure transform solid dye particles into a gas without passing through a liquid phase. This gas bonds permanently with a polymer-coated surface, creating vibrant, long-lasting images that won't peel, crack, or fade. When you combine the skinny tumbler shape with sublimation, you get a custom drinkware piece that is both functional and artistic.
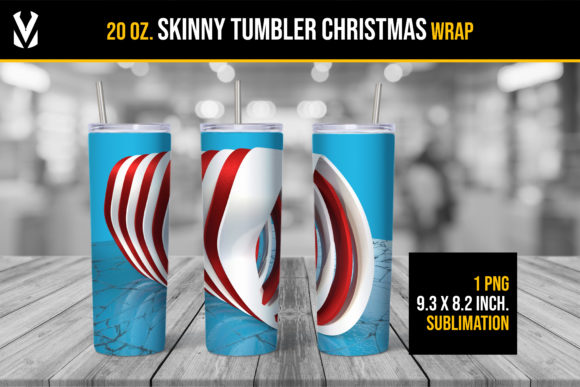
Now, add Christmas 3D to the mix. This isn't just about printing a flat snowflake or a reindeer silhouette. The 3D effect uses layered designs, depth illusions, and often a special textured overlay or wrapping technique to make the image appear to pop out from the tumbler's surface. Think of a Christmas tree that seems to stand out, with ornaments that look round and shiny, or a snowman whose scarf appears to wrap around the cup. That's the magic of 3D sublimation on a skinny tumbler.
Why Skinny Tumblers Are Perfect for Christmas Gifts
The holiday season is all about giving, and a personalized tumbler checks many boxes. It's useful, customizable, and can be made to match anyone's style. Skinny tumbler sublimation Christmas 3D pieces are especially popular because they feel like a small piece of art. Here's why they resonate so well:
- Practicality meets beauty: People use tumblers daily — for coffee, tea, water, or hot cocoa. A Christmas-themed tumbler can be used throughout the holiday season and beyond, serving as a cheerful reminder of the giver.
- Endless personalization: Names, family photos, favorite holiday quotes, or even a beloved pet dressed as an elf — sublimation allows for almost any design. The 3D effect adds an extra layer of wow.
- Small business opportunity: Many crafters sell these tumblers at holiday markets or on Etsy. The combination of a trending technique (3D sublimation) with a high-demand season (Christmas) creates a profitable niche.
- Durable and safe: Sublimated designs are dishwasher-safe and won't wear off like vinyl decals. This makes them a reliable gift that lasts for years.
Understanding the 3D Effect in Sublimation
You might be wondering: how exactly does a flat printing process create a 3D look? It's a clever mix of design principles, material selection, and technique.
Depth Illusion Through Design
Most 3D effects begin with the artwork itself. Designers use shading, highlights, and perspective to give flat images a sense of depth. For example, a Christmas ornament might have a dark shadow on one side and a bright white highlight on the opposite side, making it look spherical. When sublimated onto a curved tumbler, these visual cues trick the eye into seeing a 3D object.
Texture and Overlays
Some crafters take it a step further by adding physical texture. After sublimating the base image, they might apply a clear epoxy or resin layer that is domed or shaped to mimic the contours of the design. For instance, a snowman's belly could be built up with resin to feel round. This combination of visual and tactile depth creates an impressive 3D effect that stands out.
Wraparound Continuity
A skinny tumbler's curved surface naturally enhances the 3D appearance. When a design wraps seamlessly around the cup — like a continuous Christmas village scene — the image appears to exist in a three-dimensional space. The viewer's perspective shifts as they rotate the tumbler, reinforcing the illusion.
How to Make Your Own Skinny Tumbler Sublimation Christmas 3D
Ready to try it yourself? Here's a step-by-step overview of the process. Keep in mind that sublimation requires specific equipment and materials, but the learning curve is manageable even for beginners.
- Gather your supplies: You'll need a white or light-colored polyester-coated skinny tumbler, sublimation ink and paper, heat-resistant tape, a convection oven or a tumbler heat press, and protective gloves. For the 3D effect, consider using a domed epoxy kit.
- Design your image: Use graphic software (like Adobe Photoshop, Canva, or CorelDRAW) to create your Christmas design. Incorporate elements that suggest depth — shadows, layers, and gradients. Popular themes include nativity scenes, Santa with his sleigh, Nordic patterns, and whimsical snowmen.
- Print and tape: Print your design onto sublimation paper using a printer equipped with sublimation ink. Cut out the image and carefully tape it around the tumbler, ensuring there are no wrinkles or gaps. For a 3D effect, you might use multiple layers of printed paper that build up the image.
- Heat and press: Place the taped tumbler in a convection oven at around 400°F (204°C) for 10–15 minutes, or use a tumbler heat press according to the manufacturer's instructions. The heat turns the ink into gas, which bonds with the tumbler's coating.
- Cool and reveal: Let the tumbler cool completely, then remove the paper. Your design should be vibrant and permanent. If you want a domed 3D effect, apply epoxy or resin over specific elements and cure it as directed.
- Seal and finish: Some crafters apply a clear protective coating to ensure the design stays flawless. Add a lid and straw, and your skinny tumbler sublimation Christmas 3D masterpiece is ready.
Design Ideas for Christmas 3D Tumblers
If you're looking for inspiration, here are some popular themes that work beautifully with the 3D effect:
- Frosty the Snowman: Use layered shades of white, blue, and orange. Build up the nose and buttons with resin for a tactile 3D look.
- Christmas Tree with Ornaments: Create a tree that wraps around the tumbler. Add shiny ornaments that appear to hang off the branches using highlight gradients.
- Hot Cocoa Scene: A steaming mug, marshmallows, and candy cane details. The steam can be made to look wispy and dimensional with careful shading.
- Family Name Plaid: Incorporate a family name in a bold font, surrounded by a plaid or tartan pattern. Use shadow layers to make the name pop.
- North Pole Map: A vintage-style map with "You Are Here" marked on Santa's workshop. The curling edges of the map can be enhanced with epoxy.
Common Misunderstandings About 3D Sublimation
As with any popular craft, there are a few myths and misconceptions that can trip up newcomers. Let's clear those up.
"Sublimation only works on flat surfaces." This is probably the most common misunderstanding. While it's true that the process works best on curved surfaces when using a wrap or press, cylindrical objects like tumblers are actually ideal. The even pressure and heat distribution (especially in a convection oven) allow for excellent results. The 3D effect relies on the curve, not against it.
"You need a 3D printer to get a 3D look." Not at all. The "3D" in this context refers to the visual and tactile illusion, not additive manufacturing. You're using sublimation, not printing layers of plastic. The depth comes from design and post-processing (like resin), not from a 3D printer.
"Any tumbler works for sublimation." Actually, only tumblers with a polyester coating (or a special polymer layer) are suitable. Regular stainless steel or glass won't hold the dye. Always look for "sublimation-ready" or "polyester coated" when purchasing blanks.
"The 3D effect will wear off." If you use proper sublimation techniques and seal the design correctly, the color is permanent. The epoxy or resin layer, if used, is also durable. With care, your tumbler can last for years without losing its 3D appearance.
Where Skinny Tumbler Sublimation Fits into Modern Life
These tumblers are more than just a craft trend. They represent a convergence of personal expression, technology, and tradition. Here's how they fit into various aspects of our lives:
- Small business: Many entrepreneurs start with sublimation because the equipment is relatively affordable. Christmas 3D tumblers are a seasonal bestseller, often commanding premium prices. They're popular as corporate gifts, teacher appreciation presents, and family heirlooms.
- Home decor: A set of Christmas tumblers can be part of your holiday tablescape. Use them for mulled wine, eggnog, or simply as decorative pieces on a shelf.
- Gift giving: Personalized tumblers show thoughtfulness. A 3D design featuring the recipient's favorite holiday memory (like a specific ornament or family pet) makes the gift unforgettable.
- Community and creativity: Sublimation groups on social media share tips, design files, and encouragement. Making these tumblers can be a social activity, whether you're crafting with friends or participating in a local makerspace.
Tips for Beginners: Start Simple, Dream Big
If you're new to skinny tumbler sublimation Christmas 3D, start with a simple design — perhaps a single snowflake or a word like "Joy" in a festive font. Master the basic sublimation process first. Once you're comfortable, experiment with gradients and shadows to create depth. Then, try adding a small resin element, like a raised candy cane.
Don't be afraid to make mistakes. Every misprint teaches you something about heat, timing, or design. Watch tutorials, read forums, and practice on inexpensive blanks. Soon, you'll be creating tumblers that make people say, "Wow, that looks 3D!"
The Future of Christmas 3D Tumblers
As sublimation technology evolves, we're seeing even more advanced possibilities. Some crafters are experimenting with augmented reality, where scanning a tumbler with a phone triggers a holiday animation. Others are combining sublimation with glow-in-the-dark powders or color-changing leuco dyes that shift when hot or cold liquid is poured in. The skinny tumbler remains the ideal canvas because of its portable, everyday nature.
For Christmas, these innovations mean that your gift could include a hidden message that appears only when the coffee is poured, or a star that glows after the lights go out. The intersection of tradition and tech is where the magic happens.
Conclusion: More Than Just a Cup
Skinny tumbler sublimation Christmas 3D is a craft that brings together artistry, science, and holiday spirit. Whether you're making one for yourself, gifting it to a loved one, or building a small business around it, the process is deeply satisfying. You start with a blank surface and a vision, and you end with a functional piece of art that carries warmth and joy.
So this Christmas, why not try your hand at creating a 3D tumbler? Let the snowman pop, the ornaments glow, and the cocoa steam feel almost real. Your loved ones will sip their drinks with smiles, knowing someone put heart and skill into their gift. And that's what the season is all about.
Happy crafting, and may your holidays be as vibrant as your designs.